Install IDA
By following the steps in this guide, you can successfully install your IDA instance on macOS, Linux, and Windows.
The installation steps are valid for all product versions: IDA Pro, IDA Home, or IDA Free.
This installation guide is dedicated to individual users.
Minimum system requirements
{% tabs %} {% tab title=“macOS” %} macOS 12 (Monterey) or later (x64 or ARM64) {% endtab %}
{% tab title=“Linux” %} x64 (x86_64) CentOS 7 or later, Ubuntu 16.04 or later. Other equivalent distributions may work but not guaranteed. {% endtab %}
{% tab title=“Windows” %} Windows 8 or later (x64) {% endtab %} {% endtabs %}
Pre-installation steps
Activate your named or computer license via My Hex-Rays portal.
Installation on macOS
Prerequisites:
- Ensure that you have activated your computer/named license and downloaded your license file (ida.hexlic) locally.
- Make sure Python 3 or later is installed on your computer for the IDAPython API to function properly.
Step 1: Download the installer
- Download the macOS version of IDA Pro from Download Center in My Hex-Rays portal.
Quick alternative
{% hint style=“success” %}
HCLI Commands | See HCLI Docs
hcli download
{% endhint %}
Step 2: Run the installer
- Extract the .zip archive.
- Double-click on the extracted file to run the instalation wizard.
- Follow the wizard’s instructions to complete the installation:
- accept the license agreement and installation directory;
- copy your
ida.hexlicfile to IDA installation directory or to$HOME/.idaprodirectory before launching IDA.
Quick alternative {% hint style=“success” %}
HCLI Commands | See HCLI Docs
hcli ida install <path-to-installer>
{% endhint %}
Step 3: Launch IDA Pro for the first time
- Double-click on the IDA Pro icon to launch the application.
Step 4: Point to your named/computer license
{% hint style=“info” %} The step below is valid for named and computer licenses for individual use. If you are going to use floating licenses, check this alternative step. {% endhint %}
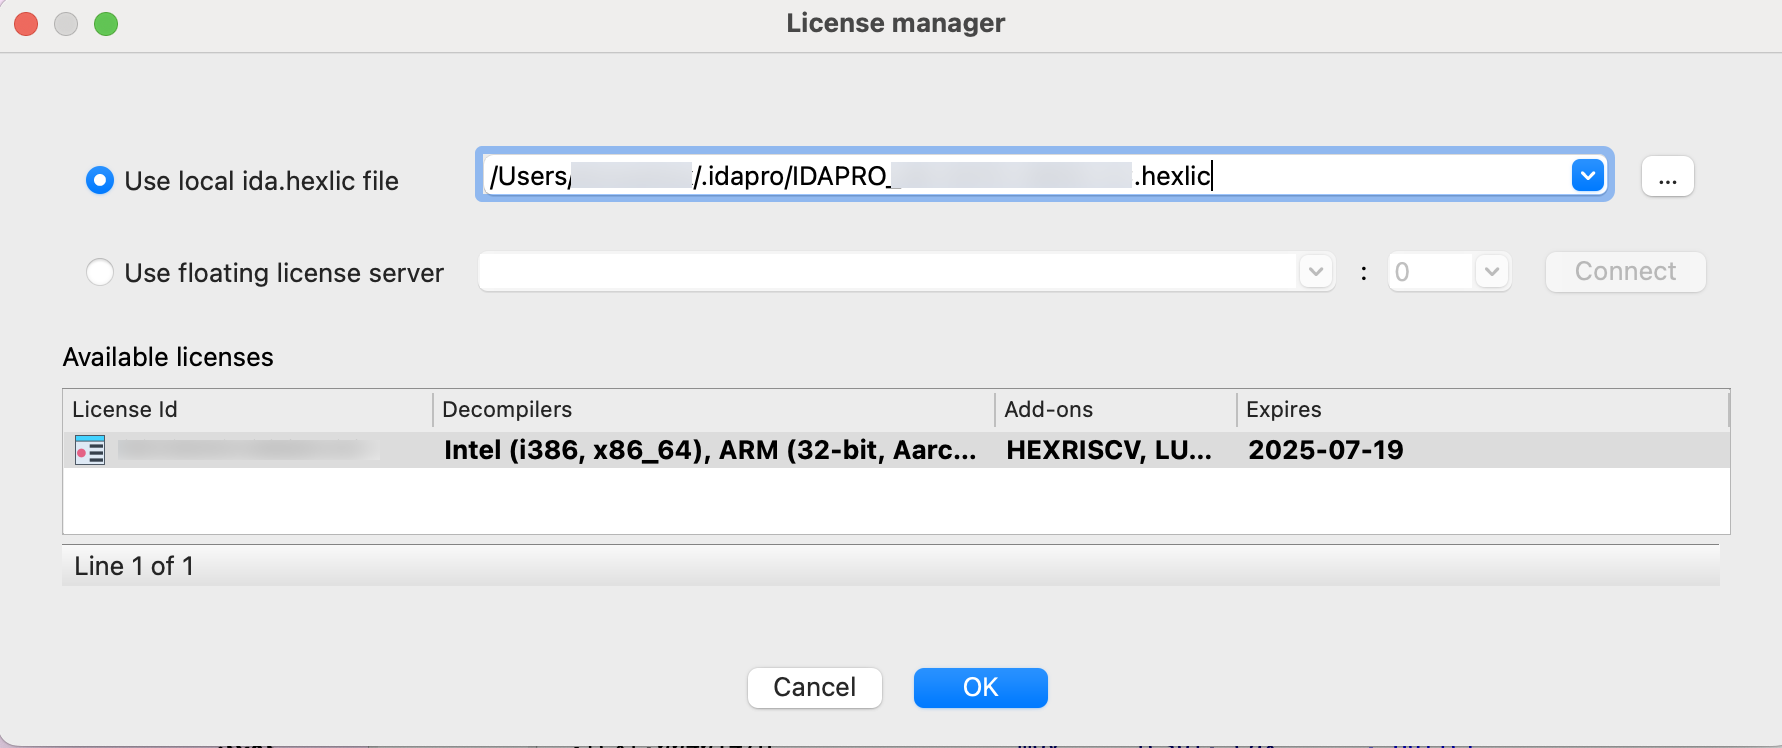
- In the License manager pop-up window, specify the path of your license file and click OK.
{% hint style=“info” %} You won’t be asked about your license again unless the subscription period expires or you move your license file to a different location. {% endhint %}
Installation on Linux
Prerequisites:
- Ensure that you have activated your computer/named license and downloaded your license file (ida.hexlic) locally.
- Make sure Python 3 or later is installed on your computer for the IDAPython API to function properly.
- Verify that you have the required libraries installed. Use your package manager to install any missing dependencies. Common dependencies include
libx11,libxext,libxrender, andlibglib2.0.
Step 1: Download the installer
- Download the Linux version of IDA Pro from Download Center in My Hex-Rays portal.
Quick alternative
{% hint style=“success” %}
HCLI Commands | See HCLI Docs
hcli download
{% endhint %}
Step 2: Run the installer
- Navigate to the directory containing your IDA installer, and make it executable.
- Run the installer by double-click it or enter
./<your_IDA_version_>linux.runin the terminal to execute it. - Follow the wizard’s instructions to complete the installation:
- accept the license agreement and installation directory;
- copy your
ida.hexlicfile to IDA installation directory or to$HOME/.idaprodirectory before launching IDA.
Quick alternative {% hint style=“success” %}
HCLI Commands | See HCLI Docs
hcli ida install <path-to-installer>
{% endhint %}
Step 3: Launch IDA Pro for the first time
- Go to the directory where IDA is installad and run the command:
./ida90
Step 4: Point to your named/computer license
{% hint style=“info” %} The step below is valid for named and computer licenses for individual use. If you are going to use floating licenses, check this alternative step. {% endhint %}
- In the License manager pop-up window, specify the path of your license file and click OK.
{% hint style=“info” %} You won’t be asked about your license again unless the subscription period expires or you move your license file to a different location. {% endhint %}
Installation on Windows
- Ensure that you have activated your computer/named license and downloaded your license file (ida.hexlic) locally.
- Make sure Python 3 or later is installed on your computer for the IDAPython API to function properly.
Step 1: Download the installer
- Download the Windows version of IDA Pro from Download Center in My Hex-Rays portal.
Quick alternative
{% hint style=“success” %}
HCLI Commands | See HCLI Docs
hcli download
{% endhint %}
Step 2: Run the installer
- Locate the downloaded
.exefile and double-click it to run the installer. - Follow the installation wizard’s instructions to complete the installation:
- accept the license agreement and installation directory;
- copy your
ida.hexlicfile to IDA installation directory or to%APPDATA%/Hex-Rays/IDA Prodirectory before launching IDA.
Quick alternative {% hint style=“success” %}
HCLI Commands | See HCLI Docs
hcli ida install <path-to-installer>
{% endhint %}
Step 3: Launch IDA Pro for the first time
- Navigate to the Start Menu or desktop shortcut and launch IDA Pro.
Step 4: Point to your named/computer license
{% hint style=“info” %} The step below is valid for named and computer licenses for individual use. If you are going to use floating licenses, check this alternative step. {% endhint %}
- In the License Manager pop-up window, specify the path of your license file and click OK.
{% hint style=“info” %} You won’t be asked about your license again unless the subscription period expires or you move your license file to a different location. {% endhint %}
Use floating license server
Step 1: In the License manager pop-up window, select the option Use floating license server and then type a license server hostname provided by your administrator.
Step 2: Borrow one of the licenses visible under the available licenses list and click OK.
Note that you don’t need a license file stored on your machine locally while using floating licenses.
Common Post-Installation Steps
Step 1: Update IDA Pro
- After installation, check for any available updates. Hex-Rays often releases patches and updates for IDA Pro. You can check for updates within the application via Help -> Check for free update or download the latest version from My Hex-Rays portal.
Step 2: Configure environment (optional)
- Customize your IDA Pro environment settings to suit your preferences. This can include configuring hotkeys, and adjusting appearance settings.
Step 3: Install additional plugins (optional)
- You can extend the functionality of IDA Pro by installing additional plugins that can be found on the official Hex-Rays repository or other trusted sources in the reverse engineering community.